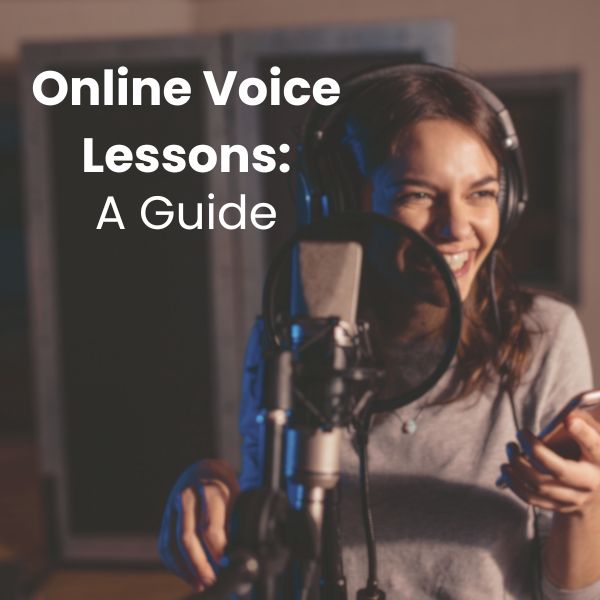


Online Voice Lessons: A Guide
Can You Learn Voice Online?
I started teaching online during the pandemic. Those were crazy days when the technology was barely there for us to provide a quality lesson. I actually dropped my rates because I was afraid that my lesson quality would be dramatically lower. The music world has come a long way since 2020. Not only has technology significantly improved for online voice lessons, but those of us who have been doing it since then have gotten pretty good at it! Online voice lessons can be just as good as lessons held in person – and there are some nice advantages to them!
Study with Anyone
Ok. Maybe not quite anyone, but many voice teachers work online at least part time. In my case, I only teach only online. If your area doesn’t have teachers with availability or a specialty you need, the internet can be your friend! Economics may play a part in your decision to move online. I no longer charge lower rates for my online lessons because I know the quality is there. However, I may charge less than a comparable teacher in a big city. I also offer several packages with a variety of benefits and bespoke packages. I may be the right teacher for your circumstances. Other teachers offer different packages and rates who may be a better fit.
Stay Home!

Do you have a calendar full of appointments that keep you in your car for hours on end? Online voice lessons keep you home – no driving needed. You don’t even need to get out of your PJs and slippers!
Keep in mind that you’ll need a spot in your house where you can make some noise. My students often take their lessons in their bedrooms. I’ve also had them banish their family members from the living room during their lesson. Once you find a spot, make sure you have space to stand up and move around some. You’ll also need to be front lit. Don’t stand with your back to a bright light like a window or lamp.
Better Guidance
When I moved my studio online, I had no expectations. My goals were pretty simple – keep teaching so I could stay in business! I quickly discovered that I could actually provide better guidance online for a couple of reasons.
In an face-to-face lesson, I sit at the piano and my student stands towards the end of the piano so I can see them. I’m usually playing the piano so I’m not watching them all the time. I’m juggling them and the piano part of their song. Lots of us voice teachers do this, and I’m fairly efficient at it, but I’m still not watching my student 100% of the time. In an online lesson, I don’t play for my students – at least not much, so I’m more focused on them. Instead, my students use backing tracks that they play on their end.
While I’m more focused on students, I can also usually see better. During a face-to-face lesson, I’m usually several feet away from my student. Normally, during an online voice lesson, we’re both fairly close to our cameras. I am close enough to really see what my student is doing. Often times, this means I can give better guidance faster.
Tech for Online Voice Lessons
Lag: Can you hear me? I think you froze up….
By now, most people know the term lag. Lag can make or break an online voice lesson. Simplistically speaking, we can think about our online call as a pipe between our two devices. The pipe has a bunch of stuff on either end that can either speed up or slow down our call — the data. The more we can do to make that stuff at both ends efficient, the better the call can be. The remainder of this article discusses the tech considerations for online voice lessons. You don’t need a high-end set up for a decent lesson, but there are things you can do to get the most out of what you have. And, if you’re committed to lessons long term, you’ll have a path for improvement.
Adequate….probably

You usually can take an online voice lesson with the technology that you already have. Many teachers offer Zoom as an option for lessons. Zoom builds in noise cancellation and echo suppression. All of that processing creates a lot of lag, but more importantly, it means that Zoom doesn’t recognize music as anything but noise. Without adjusting the settings, Zoom will cut the sound when you’re singing. Thankfully, they offer the Original Sound setting which turns off noise cancellation. This setting is available for the Zoom app running on computers, phones, and tablets. It is not available for Chromebooks, though. It’s easy to set up and this video walks you through the process.
As long as you have Original Sound turned on, you might be fine having a lesson on your computer, phone, or tablet on WIFI with no other equipment necessary. You should be prepared to play your tracks on a separate device, though. Most of my students have their lesson on their computer and play their tracks on their phone.
Potential Problems
WIFI: Depending on your signal strength, your meeting may have a lot of stutters or it may freeze. When you enable Original Sound, you are turning off the processing that Zoom does to the sound, but you are also increasing the amount of data you’re transmitting. Low WIFI signal means it’s harder for the data to get from your computer to your router and outside world.
Built-in microphones & speakers: The built-in microphones and speakers on most computers and laptops are low-end. Macs are generally better than PCs, but they still aren’t great. In order for me to do my job, I need to hear you clearly. If your microphone garbles the sound or does its own version of noise cancellation, I won’t accurately hear what you’re doing.
Slightly Better

Sticking with Zoom and Original Sound, use a computer that’s plugged into your router. Turn off the WIFI. In many instances, this will solve the problem. You will not be able to take your lesson on a phone or tablet, but this will be true of all my recommendations from this point onward.

In order to do this, you’ll need an ethernet cable and a way to plug it into your computer. Most PCs have an ethernet port, but Macs generally don’t. If you don’t have an ethernet port, hubs that plug into a USB slot are inexpensive. Check that the hub you’re purchasing will work with your machine. If you own a Mac, you’ll find some hubs aren’t compatible.
If you make no other improvements to your set up, I recommend that you at least do this.
Much Better
Still using Zoom, but now our computer is also plugged into the router, the next step involves external microphones and headphones. Microphones should be USB microphones and not wireless. While less important, wired headphones generally offer better sound. Wireless microphones tend to add lag to the system and offer an inferior sound. Also, avoid headsets. I’ve had several students try using headsets over the years. The microphone is generally too close, so the sound gets overblown. In one instance, the the headset also had noise cancellation, so the student cut in and out.

If you want a standalone microphone, something like the Blue Yeti works well. While there are cheaper options out there, you will get what you pay for in terms of sound. For headphones, I recommend using open back headphones. Open back headphones are the opposite of noise-cancelling and closed back headphones. Open back headphones allow you to still hear ambient room noise which will feel more natural while you speak and sing. Noise-cancelling and some closed back headphones tend to push people to speak or sing more loudly because they can’t hear themselves correctly. If you do use noise-cancelling headphones during a lesson, push one side off your ear so you can still hear the room.
Even Better
In order to take advantage of this option, you’ll most likely need everything that I’ve described above: computer wired to the router, an external microphone, and headphones. Many voice teachers utilize other platforms that are designed for musicians and singers to give their lessons. I offer lessons through Farplay which is a free app for the student. Farplay offers a low latency solution, which means their technology eliminates most of the lag. Farplay’s sound is superior to Zoom and it also means that I can actually play along with my students to a certain degree. If my student is set up correctly, often times, the delay between us equates to standing on opposite sides of a really big room.
Farplay isn’t the only service out there, so talk to your voice teacher about what option(s) they have. A few options claim that you don’t need a microphone or headphones, but I don’t have experience with those services to comment on quality.
Best

Most students can stop at a USB microphone, but if you’re very serious about your music, you may want to consider a microphone with an audio interface. Focusrite offers a bundle with everything you need: microphone, headphones (closed back), audio interface, and cables. Sweetwater offers several reasonably priced bundles to pick from. You can also purchase things separately. Outside of the bundle, the only things you might want to purchase separately are a microphone stand and pop filter.
An audio interface will give you the best sound for singing. It is also more efficient than a USB microphone for processing the sound which means less lag. While I wouldn’t necessarily recommend this set up only for lessons, if you’re interested in recording yourself, this would be the way to go.
Let’s Sing!
With a little bit of planning, online voice lessons work for all ages. I’ve taught kids as young as 8, teens, and adults online. Most of my students aren’t particularly tech savvy and they do great! To learn more about my lessons and to see if your set up will work, book a Discovery Call with me!
Pingback: Private Music Lessons & Coaching - Air & Ink Studio