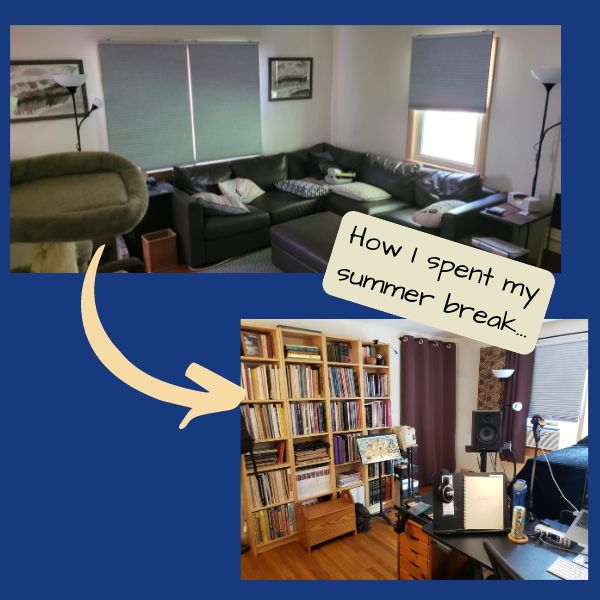


Studio Renovation – How I Spent My Summer Break
Why did we put ourselves through a studio renovation? If you live with a musician, you know they can be noisy. If you’re that musician, you know that you’re probably annoying those that live with you because you’re noisy. (And if you didn’t know, now you do!) Also, you may be annoyed by the noise that everyone else makes when you’re doing your thing. When you teach music online or you’re trying to record your music, everyone’s noise becomes even more of an issue.
My old studio lived in an area of my house that could not be closed off, so we all annoyed each other with our noises. Plus the three felines who live here compound the problem because they’re destructive little beasts. In order to keep the peace and everyone’s sanity, my amazing husband devised a studio renovation plan that involved swapping the studio and family room spaces and soundproofing my new space.
Read on if you love home renovation, like to watch other people make messes, or are curious about soundproofing. It’s all here.

The Family Room
Welcome to our old family room. Don’t mind the mess. You may notice that this space does not have doors in the door frames.
You may also notice that it has several large pieces of furniture. For those of you who have never been to my house, I live in a small Cape Cod style house. Everything has a place with little space to spare. I don’t have a spare room to throw that couch into.

Here it is all cleaned out.
With the blinds open, you can see how close our house sits to the road. Road noise can be an issue at certain times during the day, so we were keen to find ways to dampen the sound.

Here’s the family room and my old studio space combined.
Here’s a fun game: Play “Find the Piano”.
What you can’t see (at least not well): The amount of stuff packed under and around the piano and to the right of the sofa. Also, half of the sectional sofa, on its back against the wall just out of frame. As you might imagine, this turned into a much better play space for our sentient hairballs than their old cat tree.

All the stuff you need…. mostly
Delivery day’s the best – especially when they use that little forklift attached to the back of the truck. Or maybe I’m a dork.
We managed to get the dumpster delivered just outside the window of the family room. Pictured in the driveway: wallboard, insulation – both the pink and rock wool variety, joint compound and few other things. We had to tuck it in with tarps because the reno coincided with the New England Rainy Season.
Several things aren’t pictured here because my husband scurried them away or they were shipped separately. You can buy a lot of sound proofing materials from Amazon. Be warned, though, that they don’t package the acoustical caulk very well and you may end up with a box of goop. Related: pity the returns guy at Kohls who had to process said box of goop.
One other thing not pictured: doors. My husband ordered the building supplies over a month out from when we needed them. He had hoped to install the solid core doors before we started because of the aforementioned fur gremlins. The construction deities had other plans – the doors didn’t arrive until the studio renovation was almost complete.

Demo Day!
Before I get into the destruction, take a moment to marvel at my husband’s MacGyver-level door hack. He created two plywood “doors” to prevent a cat-astrophe. (See what I did there?) The lever kept the plywood in place, but made it easy(ish) to get in and out of the room. While you’re marveling at my husband’s genius, check out the garbage chute that he cobbled together from scraps.
We had two goals in mind when we planned this renovation. First, to make it so I could make as much noise as I wanted to and not annoy the other humans in the house. Second, to make it so the other humans could make noise and not annoy me. In order to do that, we needed to gut the family room. We ended up taking the two interior walls and the ceiling back to studs. We decided to leave the exterior walls alone, because even if we soundproofed the walls, the three windows would negate most of the work. (And I like things like ventilation and sunlight).

Insulation
Insulation plays a key role in soundproofing. We used rock wool insulation for the walls. The ceiling received a layer of fiberglass insulation between two layers of rock wool installation. The studio sits directly below my daughter’s bedroom. My teenage daughter does what all teenagers do – lives in her room and only emerges for food. My noise can not invade her space, so the ceiling received extra love.
After a couple of itchy days of stuffing insulation between wall and ceiling studs, we moved on to the next step in soundproofing.

Mass Loaded Vinyl & Resilient Channel
Mass Loaded Vinyl (MLV) is exactly what it sounds like – very heavy, dense vinyl. According to the website, 1 square foot weighs 2 pounds and I believe it after wrestling several large sheets of it up on the walls. I especially love the special green tape used for the seams – it makes the room look like something out of the 1980s. Once installed, between the MLV and the insulation, the room was acoustically dead. Even with the plywood “doors”, it became difficult to hear the noise from the studio in other parts of the house.
You’ll note that ceiling lacks MLV. We tried. MLV has some stretch to it. Between the weight and the stretch, we just couldn’t wrestle it into place, hold it, and staple it. Even if we had a couple of people helping us, I doubt it would have happened. Instead we used small pieces of MLV where we attached the resilient channels. Not as good as full sheet, but much more easily managed. Resilient channels create an air gap between the studs and the wallboard. This helps reduce vibration and sound transfer since only a fraction of each stud touches the wallboard. For the walls, we attached the resilient channel over the MLV.

Starting to Look Like a Room Again…
The third layer of soundproofing utilizes two layers of wallboard instead of just one. (So before you Eagle-eyed home reno nerds yell at us for hanging the wallboard wrong, this is just the first layer).
The brown goop at the seams is acoustic caulk. Unlike the caulk you get for your bathtub, this stuff is runny, smelly, and annoying to work with. In the foreground of the bottom picture you can see the best purchase we made for this project – a drywall lift. We opted to buy a cheap one instead of renting so we could take our time. The downside is that now we have to store the thing in our house. Did I mention we live in small house? My basement weeps.

And now it really looks like a room…
The second course of wallboard received a layer of green acoustical caulk before attaching it to the first course. I don’t know what the difference is between the acoustical goop besides color – the green caulk is runny and smelly just like the brown. After we got it all hung up, my husband learned that his true life’s calling does not include mudding and sanding drywall. I did learn some new vocabulary while he was doing it. None of it fit to print here, though.
At this point in the studio renovation, we still didn’t have the doors, and I was a little over a week out from re-opening the studio.

July 4th Door Delivery
While we waited for the doors, we painted the room and assembled my new desk. I sprung for a big sit/stand desk and I love it. I wish I took a picture of my old workspace while we were taking pre-renovation photos. Suffice to say that I moved from a tiny one-room apartment to a palatial estate in terms of desk space!
The doors finally showed up on July 4th. (I know, right?!) I had planned to re-open the studio on July 8th. Even though my husband worked quickly, he had some challenges to overcome. I ended up pushing my re-opening date by a few days to give him some time to work.
The door in the top picture went in fairly easily, but the door in the bottom picture…not so much. Our Cape is not only small, it’s old. It’s one of those houses where nothing is level or square. That door required a lot of my husband’s MacGyver magic and colorful language to get it all working, but he did it. The doors are solid core to help cut down the sound. The paint job looks weird because we had plans for the center panel.

Door Sound-proofing
We had some MLV left over, so we lined the center panel of the door with it. To make it look nicer, we covered the MLV in fabric first. It works with the sound panels – you can see a couple of them in the picture above with the half-painted door. More on the panels in a minute.
While they remain the acoustical weakpoint of the room, the solid core and MLV cut the sound transfer through the doors down by quite a lot. When I’m recording, the other humans in the house can’t make excessive noise – banging pots and pans, blasting music, etc – but they can do normal stuff in the house and I can’t hear them. On the flip side, when I’m making noise in the studio, they can barely hear it.

Moving a Piano
One aspect of the studio renovation that I worried about had nothing to do with the actual reno work. I needed to move my piano from one room to another. We made the decision to do it ourselves (with the help of several friends).
The cats – Felix and Minerva in the top picture and Apollo in the bottom picture – were not asked to help, but being the generous little creatures they are, they made sure to make themselves available.
I’m thankful that my baby grand is the baby-est of grands. According to my piano tech, it’s the smallest baby grand he has ever worked with. So while it was big and awkward, it could have been a whole lot worse. We moved it without incident and I even managed to re-attach the pedals correctly. My piano tech was impressed. I’m not sure he had much confidence in my abilities. Now I know how to move a piano. It’s a skill that I don’t wish to use ever again.

New Studio, Who’s This?
The results of the studio renovation – space for my stuff and a real work area.
IKEA furnished most of my studio. I love their pegboard solution. I have a home for my art supplies and some of my smaller gear. All of the shelving is from their Billy line.
I purchased two rugs from Amazon. The music themed rug was a splurge, but I love it. It matches the sound panels perfectly. I also picked up a rug for under the piano for sound proofing/dampening. A piano over a hardwood floor can be very bright, but an area rug can help reduce the sound. While I was spending all my money on Amazon, I picked up a piano cover. Since I can’t keep the certain little spreaders of hair and cruft off the piano, a cover helps keep the piano clean. Since it’s a plush velvety texture, it also acts as a sound dampener. The cats just think I created a piano sized bed for them.

Acoustic Sound Panels
One of the final layers of soundproofing came from my original studio space. We built a bunch of wall panels for my old studio space in order to cut down on the brightness of the room. While we isolated the new room acoustically from the rest of the house, once the wallboard went up, the room still had the echoes you would expect in an untreated room. The wall panels deaden the space perfectly!
Each panel consists of a wood frame stuffed with rock wool. We covered them with fabric that we liked, although, you could get special acoustic fabric. The new addition to the panel family is the bass trap in the corner. We decided that it was necessary with the piano being packed in close to the corner. My husband used a French cleat solution to hang them. In the previous space, we bolted them to the wall, but that made them hard to move around and made a mess of the walls. The French cleats won’t destroy the wall like the bolts did and it’s easy to move the panels.

So Many Books…
And I might get them organized one of these days.
Since this picture was taken, I installed lights across the top of the bookshelf to brighten that side of the room up.
The curtains bring us to the final bit of soundproofing for the studio renovation. I purchased room-darkening/insulating curtains for the windows and doors. The curtains are heavier than standard curtains and have a lining. While they aren’t quite as good as acoustic curtains, they are less expensive and they came in the sizes and color I needed. I had limited choices for the acoustic curtains I looked at.

Wrap it up, Human!
I hope you enjoyed reading about my studio renovation. My supervisor, Felix woke up from his nap to tell me that it’s time to get back to work.
If you want more details about the renovation, send me a message on the contact form. I may be able to sweet talk my husband into being a guest contributor to the blog. In the meantime, check out the stuff I do in my studio. Virtually visit me in the studio for lessons and coaching. Or, you can listen to the music I create there.
Pingback: But I Don't Have Time to Practice! - Air & Ink Studio
Pingback: Skyward Journey - Air & Ink Studio - World Fusion Original Instrumental Song